| RESTORING DOCUMENTATION
One of the major problems encountered whilst archiving educational software is the poor condition of much of the documentation. Damage to the documentation includes;
When archiving the documentation these defects are made good so that the documentation appears as close to the original as possible.
TEARS, MARKS, COMMENTS and LABELS These are quite easy to restore using a simple graphics package. A good section of the documentation is copied and pasted over the damaged area so that the mend is invisible. Pieces which are missing can also be restored using this method.
PHOTOCOPIES These often have faded ink or include artefacts. They are generally scanned at high resolution in black and white, which tends to intensify the print density but also to increase the number of artefacts. Black and white scanning will also remove any evidence of print bleed through from the reverse side. The scanned image is then painstakingly edited in a graphics package to remove artefacts and restore areas of black. Damaged letters and/or words are repaired by copying undamaged ones from elsewhere in the document and pasting these over the damaged areas.
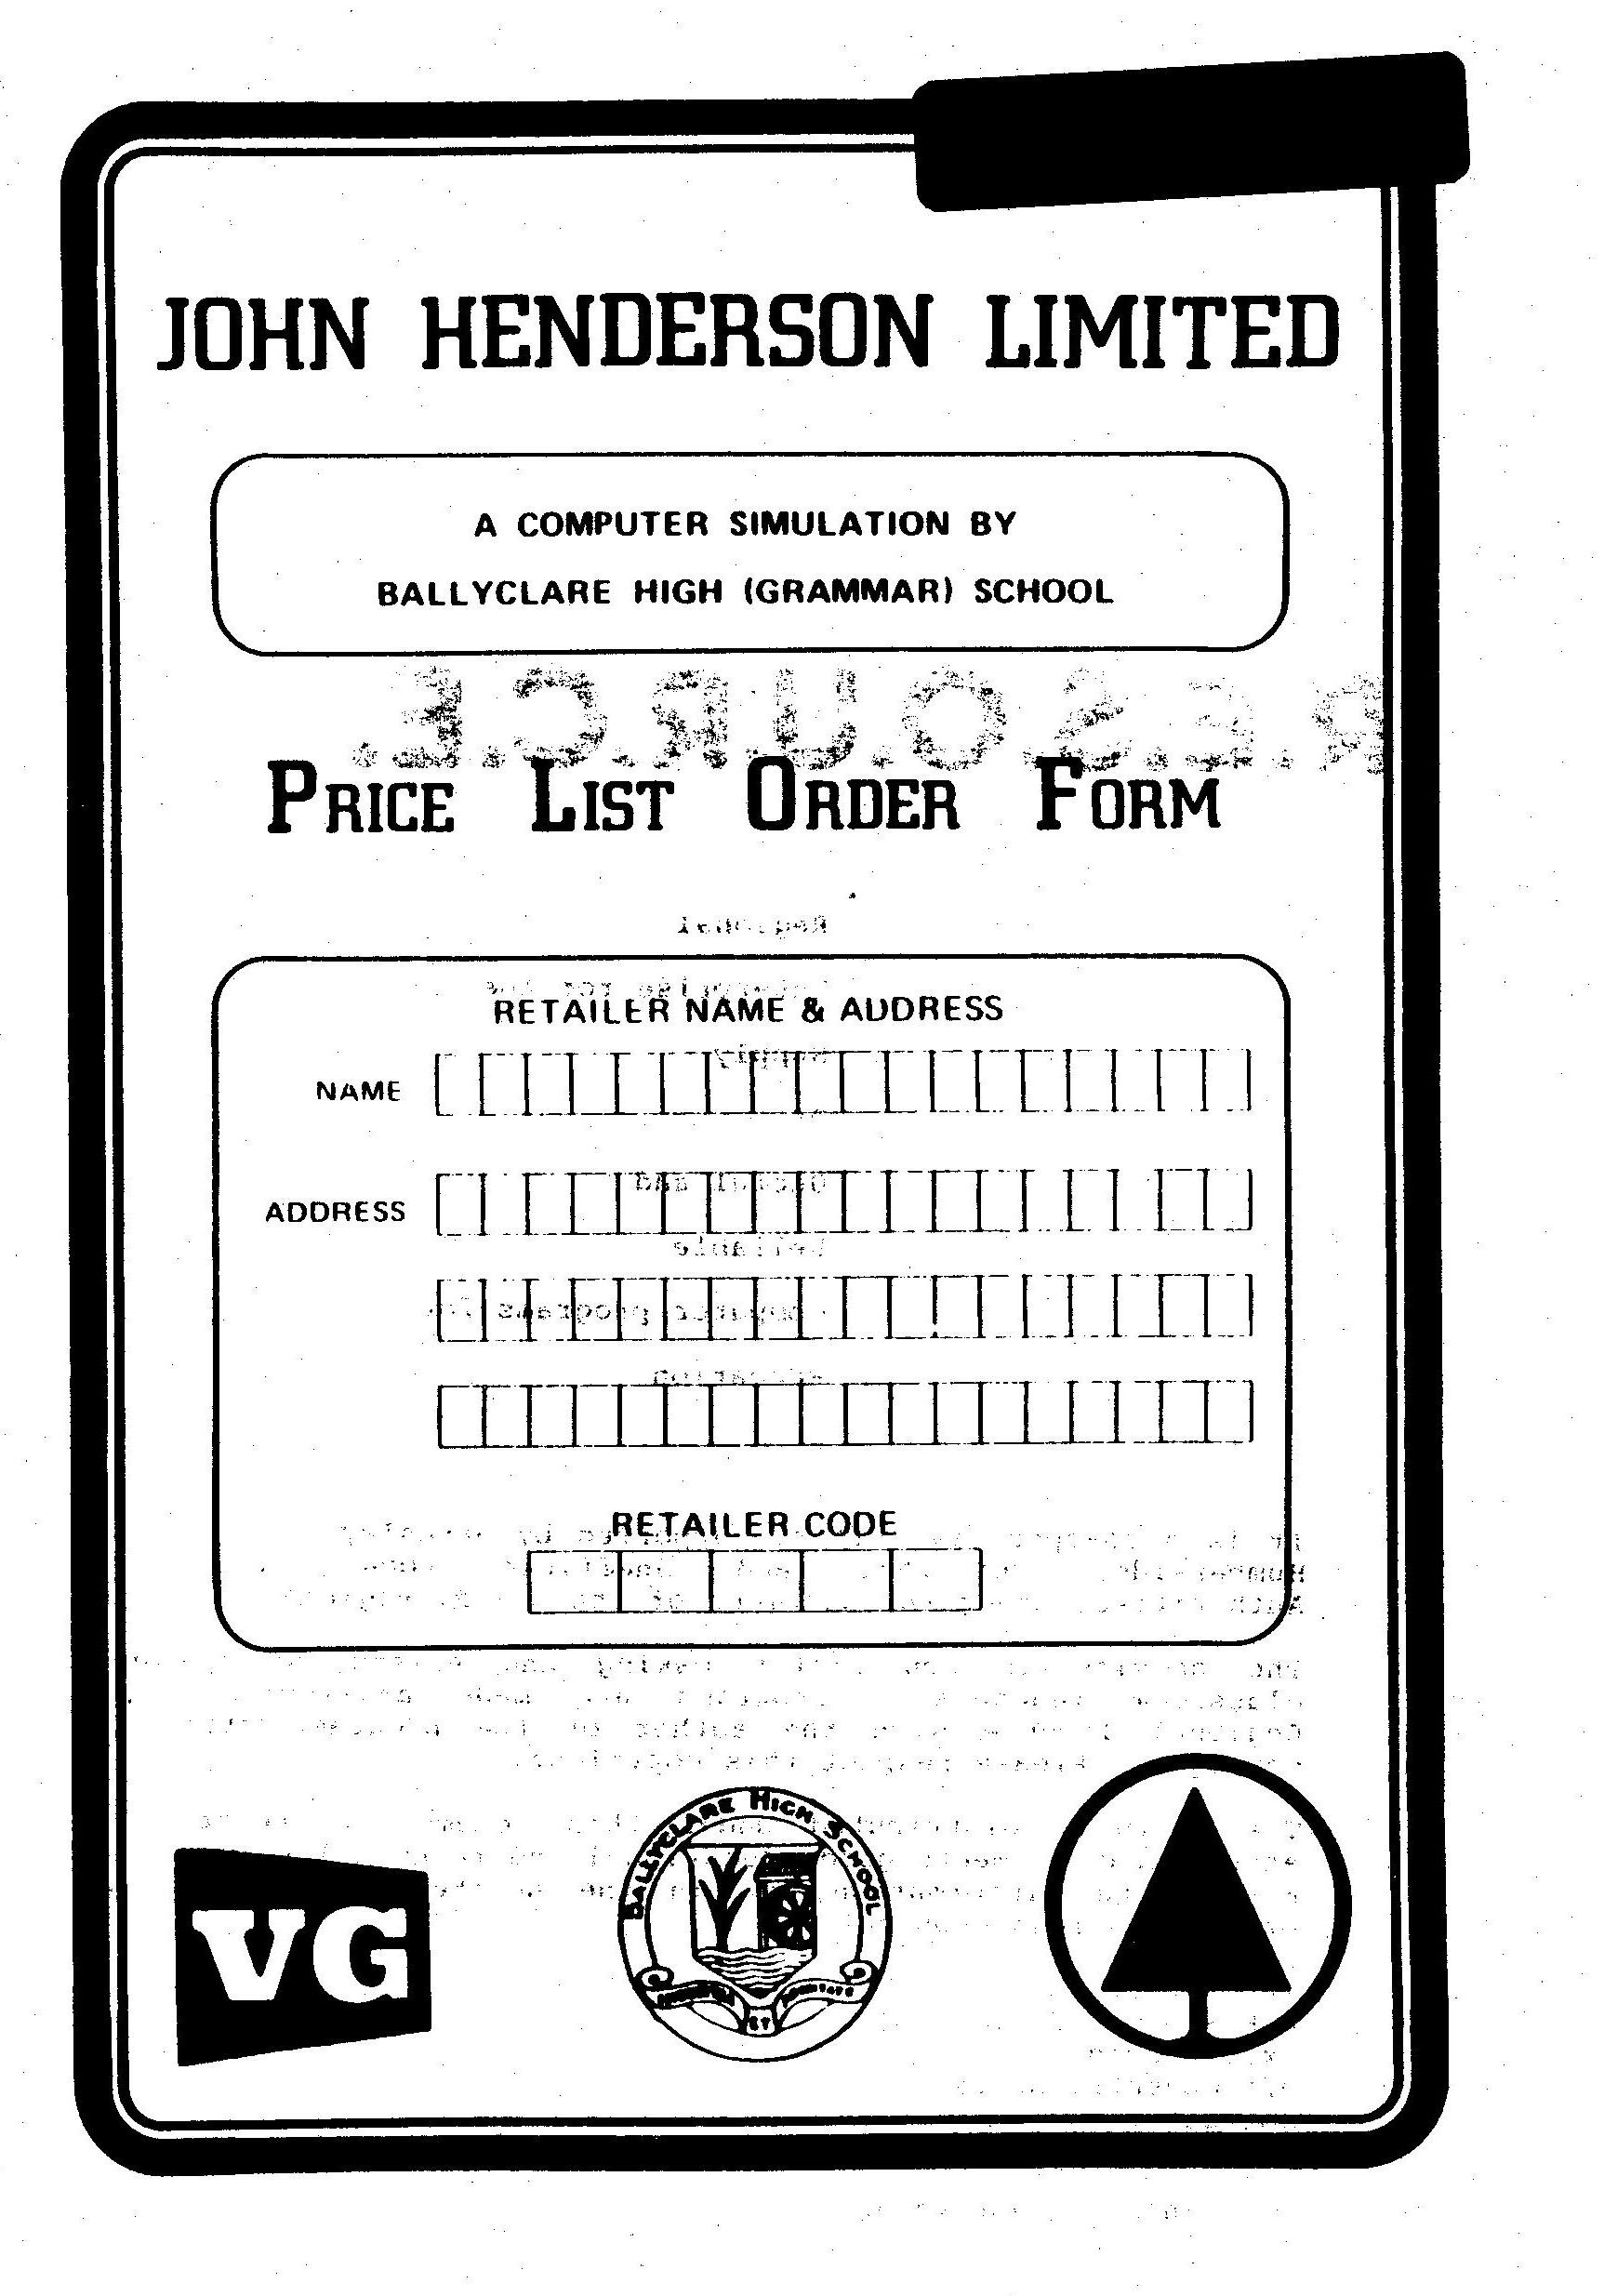
POOR QUALITY INK - A CASE STUDY Some publishers produced documentation using ink that is very intensely black and which was originally applied heavily during printing. RESOURCE is one such publisher. Over time the ink becomes tacky and will stick to anything pressing onto it, especially plastic covers and opposing pages. The ink adheres to the opposing material and prints onto it, ripping print from the original page in the process.
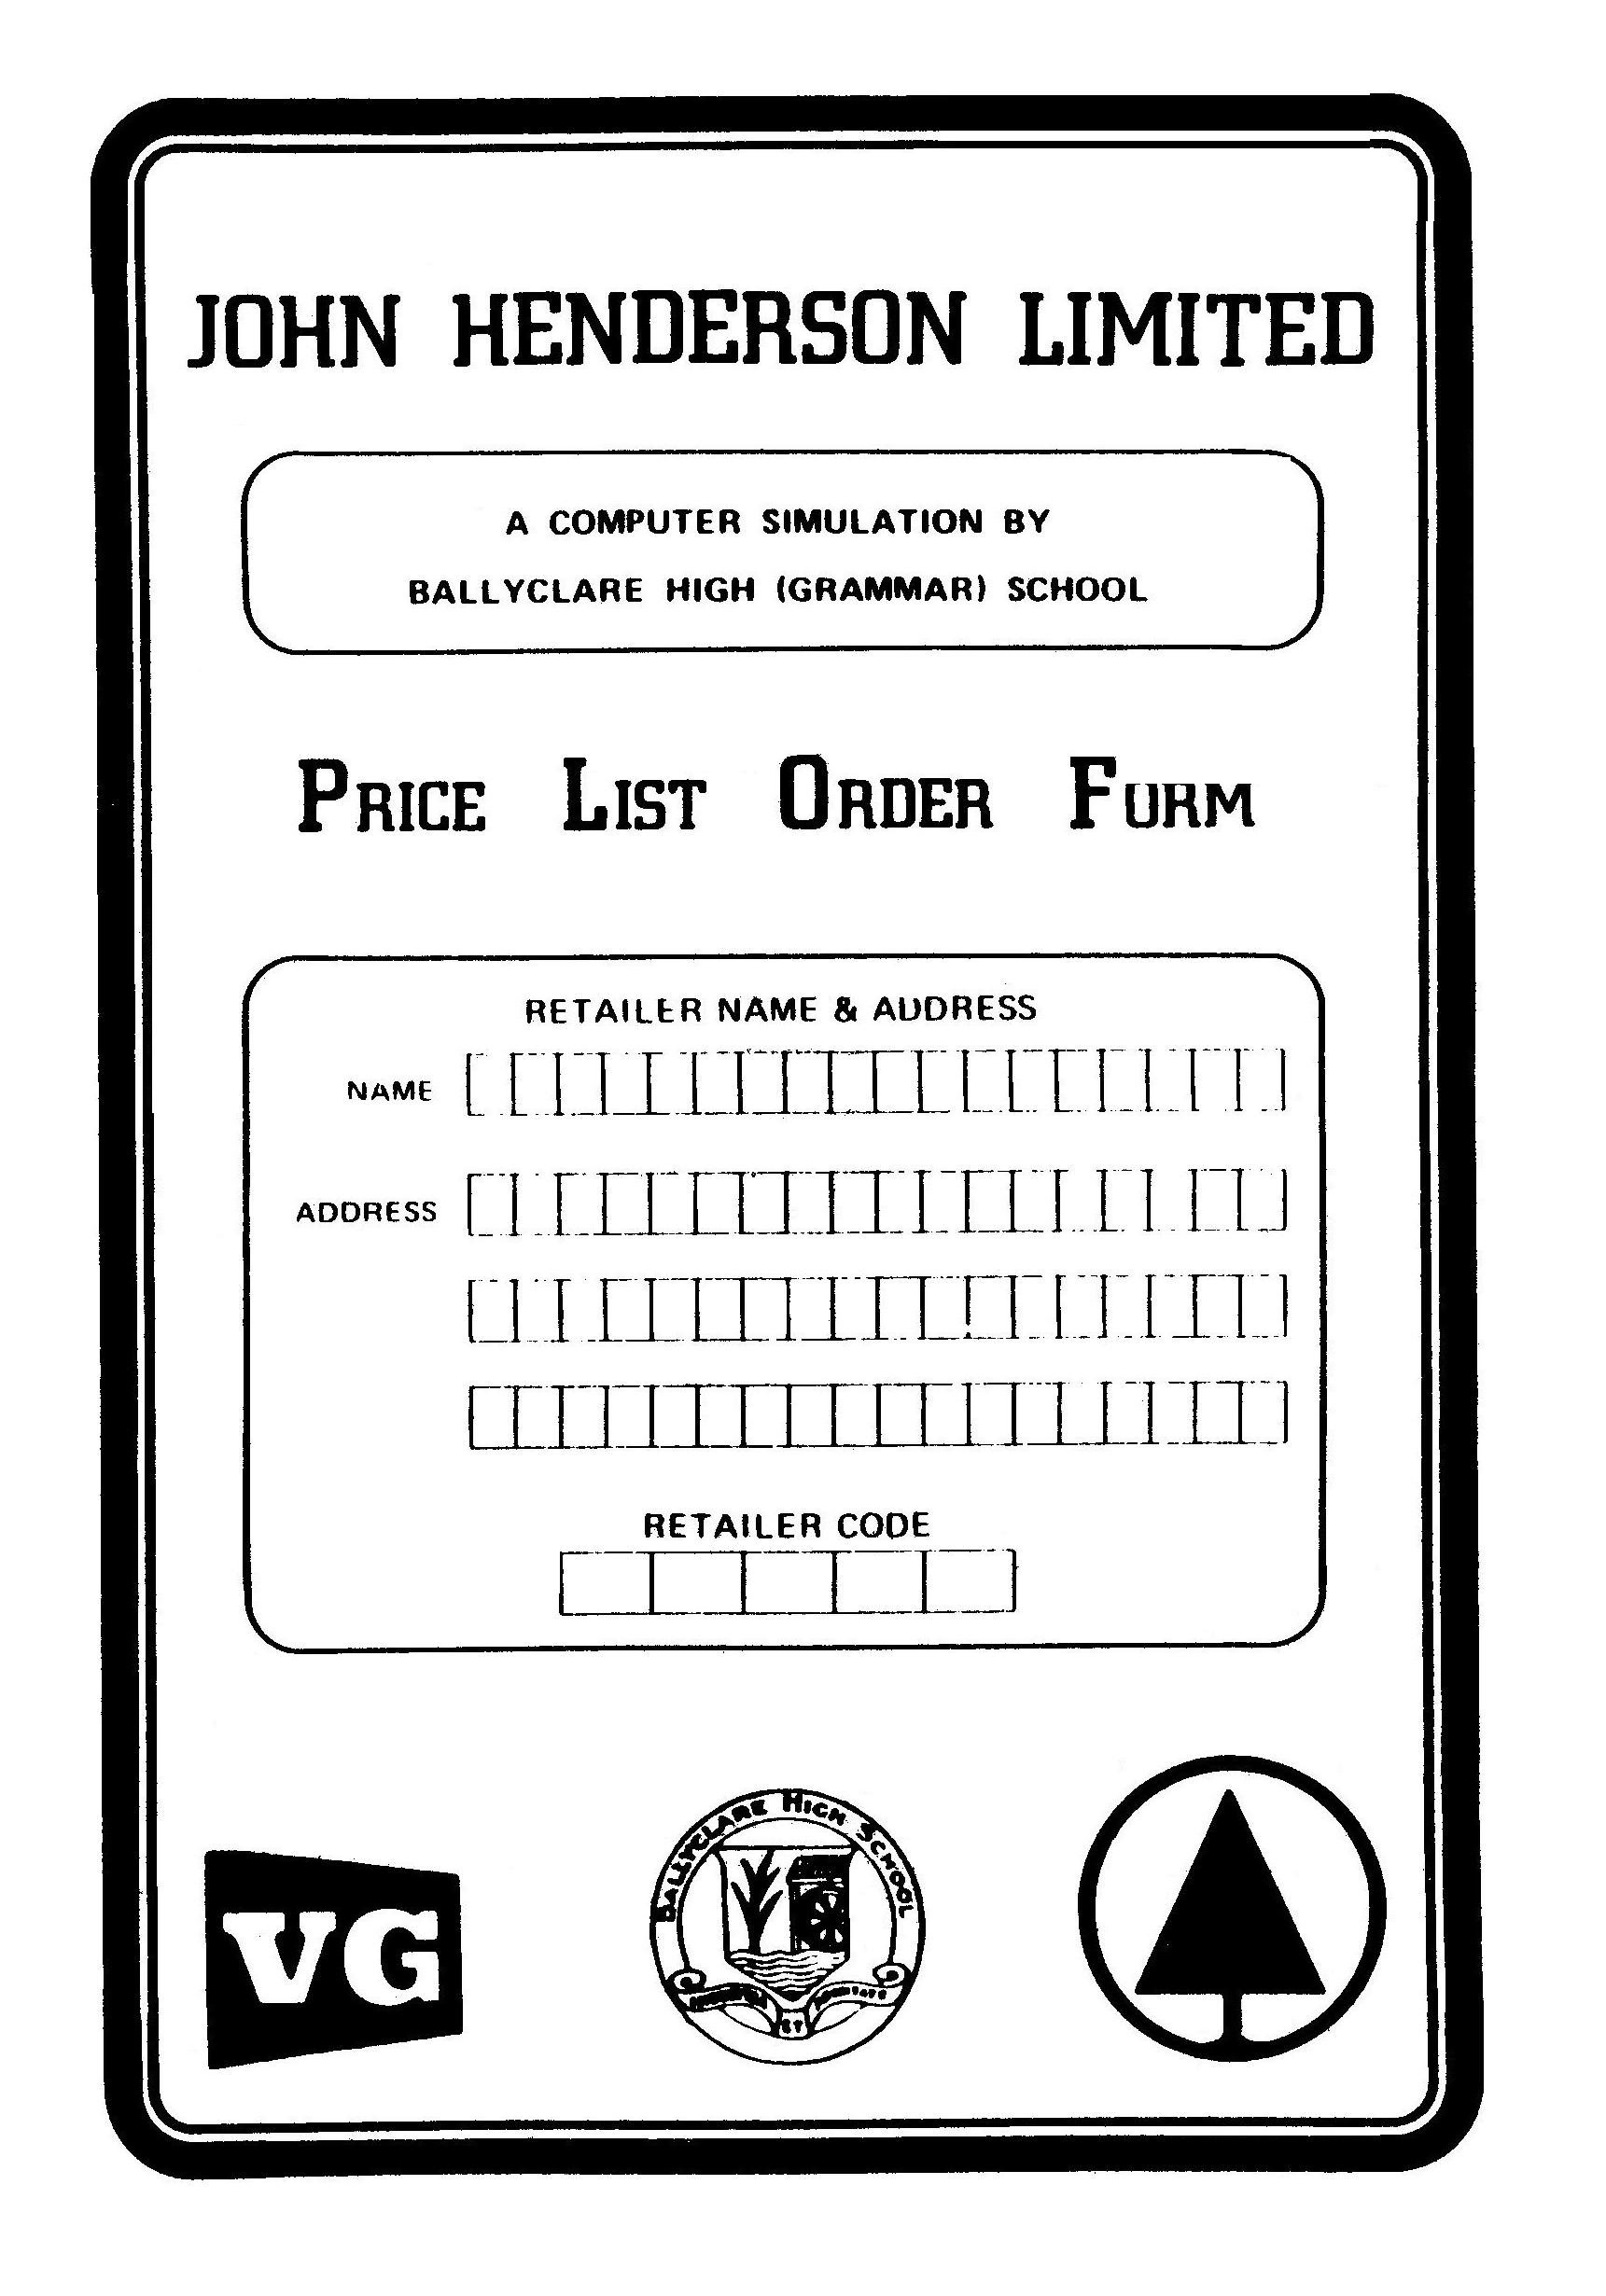
The above image shows the effect on this type of ink over time. A mirror image of a booklet cover has become imprinted onto this sheet. Equally an image of this sheet appeared on the booklet cover. There is also a label stuck to the top right corner. Since the document was black and white originally it was scanned at 300dpi in black and white and loaded into a graphics package (actually Paint, which comes bundled with MS Windows). All the unwanted over printing was removed by using the select tool and cutting. Fine detail used a small rubber tool and for restoring the black where it was missing a fine nib pen tool was used. The black label was removed by copying the top left corner of the lozenge frame, pasting it, flipping it horizontally and then sliding it into place to overlay the 'damaged' area. After about an hour's effort the image appeared as below.
The finished version is not perfect. That was never the intent. It does, however, reflect the finish of the original printing. Another problem encountered whilst archiving this title was that pages in the various booklets were not printed square (or the booklet was not cut square). The booklets were rebuilt in MS Word. A blank A5 document of 32 pages was created with the margins set to 0mm and centre formatting applied. The page images were copied from Paint and pasted onto the appropriate page in the new booklet. They were 'squared' where necessary by using the image rotate tool. Only a +/- 1 degree adjustment was necessary. Extra pages were inserted or deleted as necessary to make a booklet whose number of pages was a multiple of 4. Sometimes images need less than a degree of rotation; this is achieved using the facilities of Windows Photo Gallery, which can also adjust the 'quality' of a scan to improve its readability. Where manuals had differently coloured covers this effect was recreated by placing an appropriately coloured rectangle beneath the image of the cover and setting white in the image to be transparent so that the cover colour showed through. The rebuilt booklets were saved and converted to PDF files ready for uploading to the website. |
|
© 2018 - 2026 flaxcottage.com |