In school there is a wealth of environments within which to
create art, the computer being a newer form increasingly used in the art curriculum.
Computers are a boon to the non-artistic or to the creative child who feels a lack of
drawing skills. Experiments with form and colour can take place within minutes.
IT has had a great impact in education and, as it is so visual, it would be expected to
find it much used in art, but this just does not seem to be the case in schools. Why not?
The computer is both a tool and a means of expression: it is a new way with which to
create images (and to experiment, too).
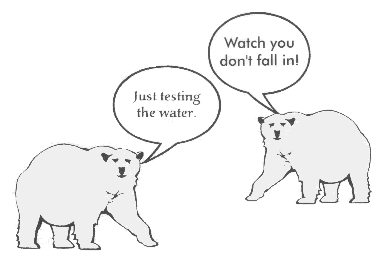
Comics offer an immediate response from children: all of them, no matter what their
intellectual capacity, go through the comic stage. At this time in their educational
development they are absorbing vast quantities of information with regard to sequencing,
plots, characters, storylines and visual impact.
The comic strip is often regarded as anti-establishment by its readers. Now is the time
to grab the attention of that rebel in room 10 who won't put pencil to paper! He will be
quite delirious with the idea that he has conned you into letting him play on the computer
instead of working, while the boot is really on the other foot.
No matter how limited your experience or knowledge, you can start with a comic strip in
the sure knowledge of a winner!
1. Starting off
It does not matter which computer you have, but you do need a drawing or painting
program - nothing special - e.g. !Draw from the applications folder on an
Archimedes or IMAGE for the BBC, will be fine.
First decide which of the following is for you:
- Draw a blank template
for use by you or the children with which to plan and
experiment
Open a drawing program.
Select the rectangle or box tool.
Place the cursor where you want the top left of the first box and Drag (keep your finger
on the mouse button as you move the mouse) the cursor down and to the right until the box
is the size you want it. A large box is easier to work with. It can be reduced later.
- Create a character from a basic shape.
Choose any basic shape from the drawing package.
Use the art tools to animate the shape and create a character.
Add a hat, glasses etc.
Give the shape a name.
Use the characters produced by a group to create a story and make a comic strip.
As you add a new item, remember to save your work often, so that if you have a disaster
there is not too much hard work lost.
- Collect a range of cartoon clip-art
for a drag and drop comic strip. Remember to
include speech bubbles as well as characters and accessories.
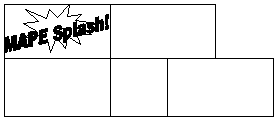
2. Provide a few frames
Leave the ending to be added.
3. Work through the instructions below until you reach the point where you want to
stop
Make a whole strip.
To do this, it is actually easier to make the drawing first and then put a box (simple
border) around it so that you, and not the box, control the size of the drawing. Hopefully
children will have picked up a few handy skills on the way by trying out some easier
exercises, gaining confidence in:
- copying,
- flipping,
- dragging,
- changing fonts and size,
- adding speech bubbles, etc.
Finally, remember that a whole series of language skills can be reinforced through the
comic strip... sequencing and direct speech, to name but two.
Strands in
English Language
- Functional writing
- Personal writing
- Imaginative writing
- Punctuation and structure
- Spelling
- Presentation
- Knowledge about language
|
|
Strands in
Expressive Arts
- Media
- Using visual investigation and recording
- Using elements
- Communicating and designing
- Observing, reflecting, describing and responding
|
|
Strands in
Environmental Studies
- Knowledge and understanding
- Planning
- Applying skills and presenting solutions
- Interpreting and evaluating
- Developing informed attitudes
|
|
Making Changes in "DRAW".
- Load a head onto the screen and SELECT it with the arrow tool.
- With the MENU button choose SELECT and UNGROUP. (it will look as if
nothing has happened but the lines of the face have been ungrouped from the white
background.)
- Move your cursor to a blank space and click the right (select) button to de-select the
objects.
- Now SELECT the face lines and drag them away.
- Choose SELECT from the MENU and UNGROUP.
- Click on a blank space to de-select.
- Move the cursor over the mouth and click.
- Choose TRANSFORM from the MENU and go to Y SCALE.
- Delete the number that is there and enter -1.
- Press RETURN.
- Drag the flipped mouth back to the face and GROUP it together again.
Use the X SCALE to flip objects from left to right and vice versa.
This is handy to change the direction of bubbles, figures, etc.
REMEMBER TO SAVE YOUR WORK OFTEN.